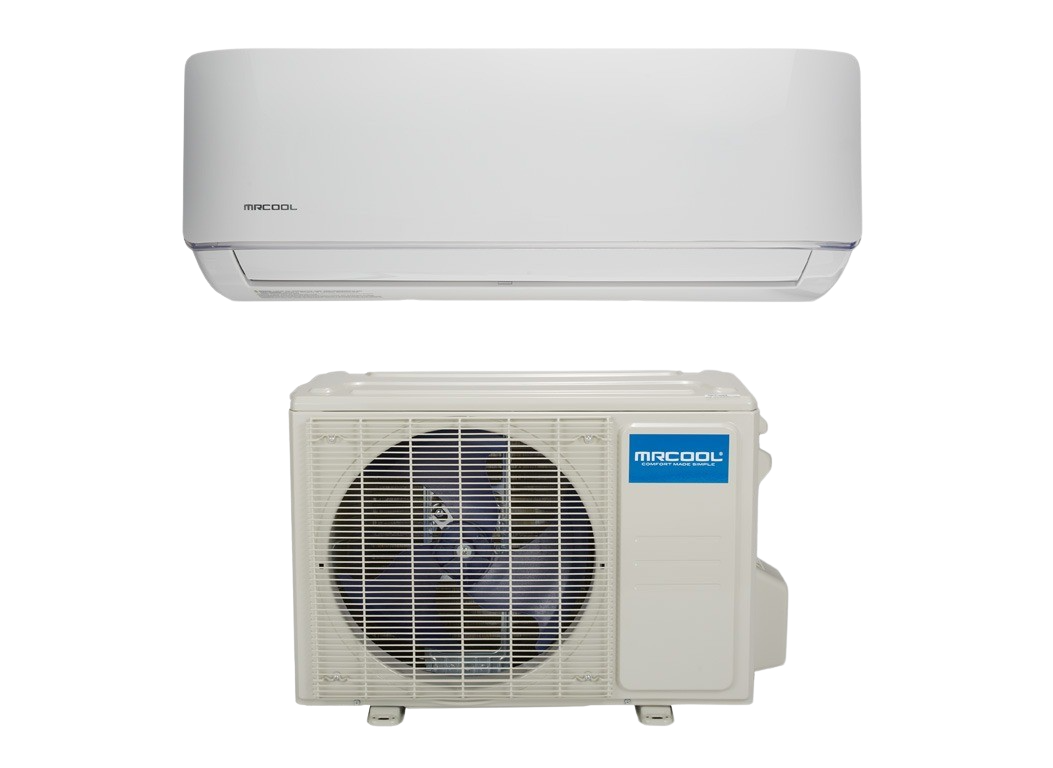
MrCool DIY 4th Gen Review: The Best Mini Split You Can Install Yourself
Save $3,000-$8,000 in HVAC labor costs with pre-charged QuickConnect line sets. No vacuum pump, no manifold gauges, no HVAC license required.
We may earn a commission on qualifying purchases through links on this page, at no extra cost to you. Our recommendations are based on independent research — manufacturer specifications, independent lab data, and aggregated owner reports — not on commission rates.
Our Verdict
MrCool
MrCool DIY 4th Gen — the only true DIY mini split. Pre-charged QuickConnect line sets, 22 SEER2 efficiency, heats down to -13°F, built-in WiFi. Save $3,000-$8,000 vs pro install.
Best for
- Homeowners skipping HVAC contractor costs
- Garages, additions, bonus rooms, ADUs
- Single-zone heating and cooling
Not ideal for
- Whole-home multi-zone (single only)
- Renters or condo owners
Free shipping • Price verified today
Quick Verdict
The MrCool DIY 4th Generation is the only mini split on the market that a homeowner can genuinely install without calling an HVAC contractor. The pre-charged QuickConnect line sets are the real innovation here — they eliminate the vacuum pump, manifold gauges, and refrigerant handling that make traditional mini splits a professional-only job. The 24K BTU sweet spot model delivers 22 SEER2 efficiency, heats down to -13°F, and includes built-in WiFi. At $1,899-$2,499 (depending on size) with zero labor costs, you're looking at total savings of $3,000-$8,000 compared to a professional installation. The tradeoff? You need to be comfortable drilling a 3-inch hole through your wall and handling basic electrical work.
Best for:
- Homeowners who want to skip HVAC contractor costs
- Garages, additions, bonus rooms, ADUs
- Single-zone heating and cooling
Not ideal for:
- Whole-home multi-zone setups (single zone only)
- Renters or condo owners (requires wall penetration)
- Anyone uncomfortable with basic power tools
Why the MrCool DIY Exists (And Why It Matters)
Mini splits are the most energy-efficient way to heat and cool a home. That is not debatable. Heat pump technology moves heat instead of generating it, delivering 3-4x more energy than it consumes. The problem has always been installation. A traditional mini split requires an HVAC technician with EPA 608 certification to handle refrigerant, a vacuum pump to evacuate the lines, manifold gauges to verify charge levels, and specialized flaring tools. That labor bill runs $3,000-$8,000 depending on your market.
MrCool solved this with their QuickConnect line sets; factory pre-charged copper lines with snap-together fittings that release the refrigerant when you connect them. No vacuum pump. No gauges. No EPA certification. No HVAC technician. The 4th Generation refines this system with better connections, R-32 refrigerant (lower global warming potential than R-410A), and improved cold-weather performance down to -13°F.
The result: a legitimate, high-efficiency mini split heat pump that a homeowner with basic tools can install in a single weekend. For California homeowners paying 30-50 cents per kWh and dealing with extreme summer heat, this is a significant opportunity to slash cooling costs without spending thousands on an HVAC contractor.
Which Size Do You Need? BTU Size Guide
Choosing the right BTU size is the single most important decision. An undersized unit will run constantly without reaching your set temperature. An oversized unit will short-cycle, wasting energy and failing to dehumidify properly. Here is the breakdown for all four MrCool DIY 4th Gen sizes:
12,000 BTU
~$1,899Coverage
350 - 550 sq ft
Circuit
115V / 15A
Best for
Bedrooms, home offices, small living rooms. The easiest to install because it plugs into a standard 115V outlet. no electrician needed for most homes.
18,000 BTU
~$2,099Coverage
550 - 900 sq ft
Circuit
115V / 15A
Best for
Large bedrooms, medium living rooms, master suites. Still runs on 115V, keeping installation simple. Good balance of power and simplicity.
24,000 BTU
~$2,199Coverage
900 - 1,400 sq ft
Circuit
230V / 20A
Best for
Open-concept living areas, large garages, ADUs, in-law suites. The 24K is the best value per BTU and delivers the highest SEER2 rating (22) in the lineup. This is the size most homeowners should buy. Requires a 230V circuit, you may need an electrician to run one from your panel if you do not already have a 230V outlet nearby.
36,000 BTU
~$2,499Coverage
1,400 - 2,000 sq ft
Circuit
230V / 30A
Best for
Large open spaces, workshops, oversized garages, converted barns. The most powerful single-zone option. Requires a dedicated 230V/30A circuit. Best for spaces where central HVAC is impractical or too expensive to extend.
Key Specifications (24K BTU Model)
| Cooling Capacity | 24,000 BTU / 2 tons |
| SEER2 Rating | Up to 22 SEER2 |
| HSPF2 Rating | Up to 10 HSPF2 |
| Heating Range | Down to -13°F (-25°C) |
| Refrigerant | R-32 (lower GWP than R-410A) |
| Line Set Type | Pre-charged QuickConnect (DIY) |
| Line Set Lengths | 16 ft or 25 ft (included) |
| Electrical | 230V / 20A dedicated circuit |
| WiFi | Built-in (Google Home, Alexa, SmartHQ app) |
| Noise Level (Indoor) | ~40 dB (whisper-quiet on low) |
| Warranty | 7-year compressor, 5-year parts |
| Price Range | $1,899 - $2,499 (varies by BTU size) |
DIY Installation: What It Actually Takes
This is the section everyone wants to read. MrCool markets the DIY 4th Gen as a “no professional needed” installation. That is mostly true, with some important caveats. Here is exactly what the installation involves, step by step:
Choose Your Location
The indoor unit (evaporator) mounts high on an interior wall. The outdoor unit (condenser) sits on a ground-level pad or wall bracket outside. They need to be within 16-25 feet of each other (depending on your line set length), separated by an exterior wall. Pick a spot where you're comfortable drilling a 3-inch hole through the wall. Avoid load-bearing headers above windows and doors.
Mount the Indoor Unit
Install the mounting plate on the interior wall using the included template. This requires a drill, a level, and wall anchors (or screwing directly into studs). The unit should sit 6-8 inches below the ceiling with at least 6 inches of clearance on each side. Then drill the 3-inch hole through the wall at a slight downward angle (for condensate drainage).
Run the QuickConnect Line Set
This is where the MrCool DIY shines. Feed the pre-charged line set through the wall hole. The line set includes the refrigerant lines, communication wire, and condensate drain, all bundled together. Connect the indoor end to the evaporator using the QuickConnect fittings. They literally snap together with a quarter turn. No flaring tools, no vacuum pump, no torque wrenches. The refrigerant releases automatically when the connection is made.
Set Up the Outdoor Unit
Place the condenser on a level concrete pad, ground-level mounting brackets, or a wall bracket. Ensure at least 24 inches of clearance on the sides and 48 inches above for airflow. Connect the other end of the QuickConnect line set to the outdoor unit, same snap-together process.
Electrical Connection
Connect the power supply to the outdoor unit's disconnect box. The 12K and 18K models plug into a standard 115V outlet. The 24K and 36K models require a dedicated 230V circuit. If you do not already have a 230V outlet near the outdoor unit location, you will likely need a licensed electrician to run a new circuit from your breaker panel. This is typically a $200-$500 job and is the one part of the installation that may require a professional.
Test and Configure
Power on the unit, connect it to WiFi through the SmartHQ app, and run it in cooling mode for 15-20 minutes to verify everything is working. Check that the indoor unit is blowing cold air and the outdoor unit fan is spinning. Seal around the wall penetration with the included putty and cover with the line set cover for a clean finish.
Installation Reality Check
Time Required
4-8 hours (first-timer)
Skill Level
Intermediate DIY
Tools Needed
Drill, 3" hole saw, level, adjustable wrench, wire strippers, stud finder
Potential Pro Help
Electrician for 230V circuit ($200-$500) if you need one run from the panel
Ready to buy?
MrCool DIY 4th Gen is stocked at Home Depot and major retailers — check current pricing on all BTU sizes.
Cooling and Heating Performance
Cooling
The 24K BTU model cools a 1,000+ sq ft space comfortably in California summer heat. The inverter compressor is the key advantage here, unlike window units that cycle on and off (creating temperature swings and noise spikes), the MrCool continuously adjusts its output to maintain your set temperature. This means steadier comfort and significantly lower energy consumption. In cooling mode, the indoor unit operates at around 40 dB on low speed, quieter than a library. You will hear it when it first ramps up, but at steady state it fades into background noise.
Heating
The 4th Generation's cold-weather heating is a major upgrade. It operates effectively down to -13°F, making it viable as a primary heat source in moderate climates and a strong supplemental heater in cold climates. The HSPF2 rating of 10 means it is approximately 2.5-3x more efficient than electric resistance heating (baseboard heaters, space heaters). For California homeowners, this is more than enough heating capacity for the relatively mild winters in most of the state.
Performance vs. Window AC Units
Energy Efficiency and Cost Savings
The 22 SEER2 rating on the 24K model places it among the most efficient single-zone mini splits available. For context, the federal minimum for new split-system air conditioners is 14.3 SEER2. The MrCool DIY is roughly 54% more efficient than the legal minimum.
What does this mean in dollars? For a California homeowner paying 35 cents/kWh (a typical PG&E or SCE rate), running the 24K BTU model 8 hours a day for 5 months of summer costs roughly $300-$450 for the season. A comparable window AC unit at 12 CEER would cost $550-$800 for the same cooling. That is $200-$350 in annual savings on the cooling side alone.
Total Cost of Ownership (5-Year Estimate)
| Cost Factor | MrCool DIY 24K | Pro-Installed Mini Split | Window AC (2 units) |
|---|---|---|---|
| Equipment | $2,199 | $2,000-$3,000 | $600-$1,000 |
| Installation | $0 (DIY) + ~$300 electrician | $3,000-$8,000 | $0 |
| 5-Year Energy Cost | $1,500-$2,250 | $1,500-$2,250 | $2,750-$4,000 |
| 5-Year Total | $4,000-$4,750 | $6,500-$13,250 | $3,350-$5,000 |
Estimates based on California electricity rates (~$0.35/kWh), 8 hours/day cooling for 5 months, plus 4 months moderate heating use. Window AC does not provide heating.
Smart Features and WiFi Integration
The 4th Generation ships with built-in WiFi, no adapter dongle needed (earlier generations required a separate WiFi kit). Once connected to your network through the SmartHQ app, you get:
SmartHQ App
- Remote temperature control from anywhere
- Weekly scheduling (set different temps per day)
- Mode switching (cool, heat, dry, fan, auto)
- Energy usage monitoring
Voice Control
- Google Home compatible
- Amazon Alexa compatible
- “Set garage to 72 degrees” voice commands
- Automation routines (turn on when you arrive home)
The WiFi integration is particularly useful for garage and workshop installations — you can start cooling the space from your phone 15 minutes before heading out, instead of walking into a 110°F garage. The scheduling feature also lets you take advantage of California TOU rates by pre-cooling during off-peak hours and letting the space coast through peak pricing periods.
Pros and Cons
Pros
- True DIY installation — QuickConnect line sets eliminate the need for an HVAC technician, vacuum pump, or refrigerant handling
- $3,000-$8,000 installation savings — the single biggest cost advantage over any competitor
- 22 SEER2 efficiency — top-tier efficiency that dramatically reduces electricity costs
- Heats to -13°F — works as both AC and heater, viable in most US climates
- Built-in WiFi — no extra dongle, works with Google Home and Alexa out of the box
- R-32 refrigerant — 67% lower global warming potential than R-410A
- Whisper-quiet — ~40 dB indoor operation, far quieter than window units
- Warranty covers DIY — 7-year compressor, 5-year parts without requiring pro installation
Cons
- Requires drilling through an exterior wall — not an option for renters or anyone uncomfortable with a 3-inch hole saw
- 230V models may need an electrician — the 24K and 36K require a 230V circuit that many homes do not have in the right location
- Single-zone only — each unit serves one room; whole-home coverage requires multiple units
- Pre-charged line sets are single-use — if you make a mistake with the QuickConnect fitting, you need a new line set ($200-$400)
- Fixed line set lengths — 16 ft or 25 ft options only; if your layout needs 30 ft, you are out of luck with the DIY line sets
- SmartHQ app is mediocre — functional but not as polished as Mitsubishi kumo cloud or Daikin One
- No multi-zone DIY option — MrCool's multi-zone models require professional installation, defeating the main selling point
Who Should Buy the MrCool DIY 4th Gen?
Garage and Workshop Owners
This is the number one use case. Garages rarely have HVAC ducting, and paying $5,000+ to get a contractor out for a single-zone garage install is hard to justify. The MrCool DIY solves this for under $2,500 with a weekend of work. The WiFi integration means you can start cooling from your phone before heading to the garage.
ADU and In-Law Suite Builders
California's ADU boom means thousands of homeowners are building accessory dwelling units that need independent climate control. A mini split is the standard HVAC solution for ADUs, and the MrCool DIY lets you handle it yourself during the build instead of scheduling (and paying for) a separate HVAC contractor.
Room Addition and Bonus Room Projects
Added a sunroom, converted a porch, or finished an attic? Extending your existing ductwork is expensive and may not be feasible. A single-zone mini split is often the most practical solution, and the DIY installation means you can handle it yourself.
Budget-Conscious Homeowners Replacing Window AC
If you are running 2-3 window units and paying inflated electricity bills for 10-15 CEER efficiency, one MrCool DIY 24K unit can replace them all while cutting your cooling energy cost by 30-50%. The upfront investment pays for itself within 3-5 years through energy savings alone, faster if you factor in the avoided professional installation cost.
Final Verdict4.6/ 5
The MrCool DIY 4th Generation is not the most efficient mini split on the market (Mitsubishi and Daikin have models pushing 26+ SEER2). It is not the quietest. It is not the most feature-rich. But it is the only one you can install yourself, and that single advantage changes the entire economics of mini split ownership.
When a comparable professionally installed mini split costs $5,000-$10,000 total and the MrCool DIY costs $2,200-$2,500 all-in, the math is hard to argue with. The 22 SEER2 efficiency is excellent (even if not class-leading), the -13°F heating range covers almost every US climate, and the built-in WiFi with Google Home and Alexa support is genuinely useful.
The 24K BTU model is the sweet spot for most buyers, it covers up to 1,400 sq ft, achieves the lineup's best SEER2 rating, and hits the right price-to-performance balance. If you are a homeowner comfortable with a drill, a hole saw, and basic electrical connections, the MrCool DIY 4th Gen is the most cost-effective way to add high-efficiency heating and cooling to any space.
Frequently Asked Questions
Can I really install a MrCool DIY mini split myself?
Yes. The MrCool DIY 4th Generation uses pre-charged QuickConnect line sets that snap together without any specialized HVAC tools. You do not need a vacuum pump, manifold gauges, or refrigerant handling certification. The main skills required are drilling a 3-inch hole through an exterior wall, mounting the indoor and outdoor units, and making basic electrical connections. Most homeowners complete the installation in 4-8 hours.
How much money does DIY installation save compared to hiring an HVAC contractor?
Professional mini split installation typically costs $3,000-$8,000 in labor alone, depending on your area and the complexity of the job. The MrCool DIY eliminates that cost entirely. A 24K BTU MrCool DIY unit costs $1,899-$2,199, while a comparable professionally installed mini split (unit plus labor) runs $5,000-$10,000 total. That is a savings of $3,000-$8,000.
What size MrCool DIY mini split do I need?
The general rule: 12K BTU covers 350-550 sq ft (bedrooms, home offices), 18K BTU covers 550-900 sq ft (large bedrooms, living rooms), 24K BTU covers 900-1,400 sq ft (open-concept living areas, garages), and 36K BTU covers 1,400-2,000 sq ft (large spaces, workshops). Climate, insulation quality, ceiling height, and sun exposure all affect sizing. When in doubt, size up rather than down.
Does the MrCool DIY 4th Gen work as a heater?
Yes. The MrCool DIY 4th Generation is a full heat pump that provides both cooling and heating. It can heat effectively down to -13°F outdoor temperatures, making it viable for most US climates. In moderate climates like California, it can serve as a primary heating source. In extreme cold climates, it works best as supplemental heat.
Does the MrCool DIY mini split need professional electrical work?
The MrCool DIY requires a dedicated electrical circuit. The 12K and 18K BTU models run on 115V/15A circuits, while the 24K and 36K models need 230V/20A-30A circuits. If you already have an available circuit of the right voltage, you can connect it yourself. If you need a new circuit run from your breaker panel, most local codes require a licensed electrician for that portion. The electrical connection at the unit itself is straightforward.
What is the MrCool DIY warranty?
The MrCool DIY 4th Generation comes with a 7-year compressor warranty and a 5-year parts warranty. This applies to DIY installations, you do not need professional installation to maintain warranty coverage. MrCool is one of the few manufacturers that explicitly supports DIY installation without voiding the warranty.
Is the MrCool DIY 4th Gen more efficient than window AC units?
Significantly. The MrCool DIY 4th Gen achieves up to 22 SEER2, while typical window AC units rate 10-15 CEER. That means the MrCool uses roughly 30-50% less electricity to produce the same cooling. Over a California summer, this can translate to $200-$500 in annual energy savings depending on usage.
Can I use the MrCool DIY with solar panels?
Yes. The MrCool DIY runs on standard household electrical circuits, so it works seamlessly with any grid-tied or hybrid solar system. Pairing a high-efficiency mini split with solar panels is one of the most cost-effective ways to cool and heat your home. Under NEM 3.0 in California, running the mini split during peak solar production hours maximizes your self-consumption and reduces grid exports at lower NEM 3.0 rates.
Related Reviews
Ready to Order the MrCool?
The only true DIY mini split, skip HVAC contractor costs and save thousands. Check current pricing on all BTU sizes.
We may earn a commission at no extra cost to you. Prices verified July 2026.
Still comparing?
Browse All Reviews